
A new water heater is more than a simple swap of one tank for another. It is an opportunity to rethink how your entire utility room functions, from clearance space to airflow to how easily you can reach the shutoff valve during an emergency. Many homeowners only think about layout after cramped quarters make maintenance a headache or a leak turns into a bigger mess than it should. Before you commit to a new unit, take a step back and look at the room as a whole system, not just a spot for a tank.

Measuring Your Space Before You Buy
The size and shape of your utility room should drive your decision about which type of water heater to buy, not the other way around. Tankless units, hybrid heat pump models, and traditional tank styles all have different footprint and clearance requirements, so measuring twice before shopping saves you from a unit that barely fits or blocks a doorway. Pay attention to ceiling height too, since some tank models are taller than what you currently have installed.
A professional who handles hot water heater install work regularly can walk through your space with you and point out clearance issues you might miss, like proximity to combustible materials or insufficient venting room. This kind of early consultation often prevents costly changes later, such as having to reroute pipes or cut into drywall to make a new unit fit properly.
- Measure width, depth, and height of the current unit and the space around it
- Note ceiling height and any overhead obstructions like ductwork or shelving
- Check door widths and hallway turns for delivery access
- Identify the location of existing gas, water, and electrical connections
Choosing Between Tank and Tankless Systems
One of the biggest layout-changing decisions is whether to stick with a traditional tank or switch to a tankless system. Tankless units mount on a wall and take up a fraction of the floor space a tank requires, which can free up a surprising amount of room for storage or a laundry setup. However, they often need upgraded gas lines or electrical service, so the switch is not always as simple as swapping boxes.
If you are comparing quotes for water heater installations, ask each contractor to explain how the layout would change with each option. A tankless system might let you relocate the unit to a wall near your utility sink instead of the corner where your old tank sat, opening up the room’s flow in ways you had not considered.
- Tankless units save floor space but require adequate wall support
- Tank systems need clearance for future replacement and drain pans
- Hybrid heat pump water heaters require more airflow than standard tanks
- Fuel type availability may limit which system is realistic for your home

Planning for Proper Ventilation and Airflow
Water heaters, especially gas-fired models, need adequate airflow to burn fuel safely and vent exhaust properly. If your utility room is small or poorly ventilated, this is the moment to address it, since cramming a new unit into a stuffy closet can create safety hazards and shorten its lifespan. Louvered doors, vent additions, or even relocating the unit to a more open area of the basement can solve airflow problems permanently.
A heat pump water heater in particular benefits from a room with enough ambient air volume, since it pulls warmth from the surrounding space to heat water efficiently. Cramming one into a tiny closet without proper airflow reduces its efficiency and can make the room feel noticeably cooler over time.
- Confirm intake and exhaust vent sizing meets local code requirements
- Add louvered doors or transfer grilles if the room lacks airflow
- Keep at least 12 inches of clearance around heat pump units for air circulation
- Avoid storing boxes or fabric near vents that could block airflow
Positioning for Easy Access and Future Maintenance
Once your new heater is installed, you will still need to reach it periodically for flushing sediment, checking the anode rod, or inspecting for leaks. Placing the unit where you can comfortably kneel or stand in front of it, with the shutoff valve and drain line easily reachable, makes routine care far less of a chore. This is also the point where many people realize their old layout forced awkward angles that made basic upkeep more difficult than it needed to be.
Think about how a water heater repairman would need to move around the unit if something went wrong. Techs need room to pull the burner assembly, access wiring, or replace a heating element, and a tight squeeze slows down every repair visit and can increase labor time and cost.
- Leave at least 18 to 24 inches of clearance on the service side of the unit
- Keep the pressure relief valve and drain line visible and unobstructed
- Store chemicals and cleaning supplies away from the immediate work area
- Install a light fixture nearby if the space currently relies on a single bulb
Protecting Your Utility Room From Water Damage
Rethinking your layout is also the perfect time to add or upgrade leak protection, since a slow drip from an aging tank can cause thousands of dollars in hidden damage before anyone notices. A drain pan with a properly routed discharge line is a simple, inexpensive safeguard that channels water away from flooring and nearby drywall. If your utility room sits on an upper floor or near finished living space, this step becomes even more important.
Many homeowners now install a smart water sensor near the base of the unit that sends a phone alert the moment moisture is detected. Pairing this with an automatic shutoff valve can stop a leak before it spreads, giving you peace of mind whether you are home or away for the weekend.
- Install a catch pan with a drain line routed to a floor drain or exterior wall
- Add a battery-powered water leak sensor near the base of the unit
- Consider an automatic shutoff valve for whole-home leak protection
- Slope the floor slightly or add a small curb if flooding risk is a known issue

Organizing Shutoffs, Wiring, and Plumbing Connections
A cluttered tangle of pipes and wires around your water heater is not just an eyesore, it is a genuine safety and efficiency concern. When rearranging the room, take the opportunity to have connections labeled clearly and grouped logically, so anyone working in the space can identify the gas shutoff, water shutoff, and electrical disconnect without guesswork. This organization pays off during emergencies when seconds matter.
Start by mapping out a dedicated zone for each system rather than letting pipes and cables cross paths randomly. Position the water shutoff valve within easy reach at roughly waist height, keep the gas line’s shutoff clearly visible with a bright tag or painted handle, and route electrical conduit along a separate wall path so it never runs parallel to water lines. Many plumbers recommend leaving at least 18 to 24 inches of clearance in front of the unit for both access and code compliance.
Labeling does not need to be elaborate to be effective. Simple weatherproof tags, color-coded tape, or a laminated diagram taped to the wall near the unit can tell a technician or family member exactly which valve controls what within seconds. Include basic instructions, like “turn clockwise to shut off,” for anyone unfamiliar with plumbing basics.
Future Maintenance Considerations
Finally, think about future maintenance, not just the initial installation. Grouping the pressure relief valve, drain line, and expansion tank fittings together makes annual inspections faster and reduces the chance of accidentally disturbing an unrelated connection. A little foresight now can save considerable time, money, and stress the next time something needs attention.
If you are already investing in a full water heater replacement, treat it as the ideal opportunity to address the smaller problems lurking around the unit. Ask your contractor to inspect the main shutoff valve, the gas or water line fittings, and the wiring while everything is already exposed and accessible. A ball valve that’s stiff, leaking, or corroded should be swapped for a modern quarter-turn version, which is easier to operate quickly in an emergency.
- Label gas, water, and electrical shutoffs with tags or color coding — red for gas, blue for water, yellow for electrical — so anyone can react fast in an emergency
- Replace any corroded or hard-to-turn shutoff valves; consider upgrading to ball valves, which last longer and turn with a quarter-turn instead of multiple cranks
- Secure loose wiring away from foot traffic and moisture using cable clips or conduit, keeping runs at least a foot from any water lines
- Keep plumbing connections accessible rather than boxed in behind shelving, leaving at least 24 inches of clearance for future repairs
- Install a drip pan or leak sensor near connections if the water heater sits above living space or finished flooring
- Route the pressure relief valve discharge pipe downward and away from wiring or shutoffs to prevent water damage during a release
Balancing Storage Needs With Equipment Space
Utility rooms often double as storage for tools, seasonal decorations, or cleaning supplies, and this competing use is frequently what caused the cramped layout in the first place. When planning around your new unit, decide upfront how much storage space you actually need versus how much clearance the equipment requires, then design shelving or cabinets that respect both. Wall-mounted shelving above the water heater’s service clearance zone is often a good compromise.
If space is extremely tight, consider whether some storage items could move to a garage, attic, or closet elsewhere in the home. Freeing up even a few square feet around the unit can make a noticeable difference in how comfortable the room feels to work in.
- Use wall-mounted shelving instead of floor units to preserve clearance
- Keep flammable materials away from the water heater’s immediate area
- Reserve at least one clear pathway for equipment access at all times
- Label storage bins so items can be found quickly without disturbing the unit
Evaluating Whether to Repair or Replace During a Remodel
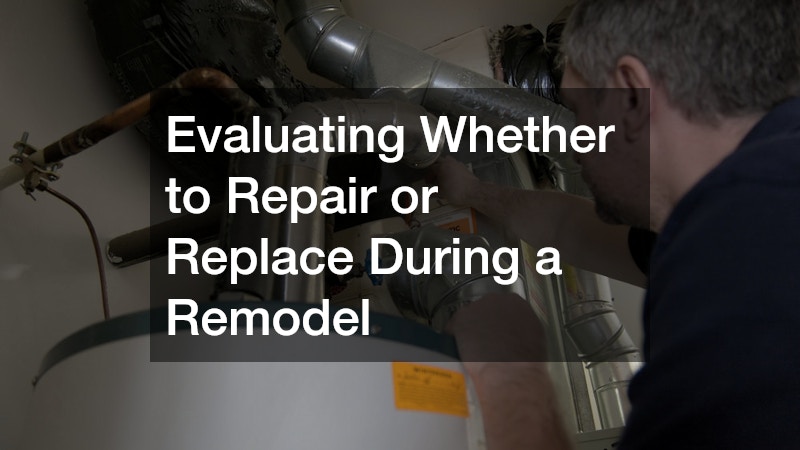
If you are already tearing into your utility room to fix layout problems, it is worth asking whether your current unit is worth keeping at all. A unit older than eight to twelve years, or one that has needed frequent visits from a technician to keep it running, may not be worth the cost of working around during a remodel. Replacing it now, while the space is already disrupted, can save you from doing the same demolition work again in a year or two.
On the other hand, if your system is relatively young and functioning well, simple water heater services, like flushing the tank and checking components, might be all that is needed before finalizing your new layout. A qualified technician can give you an honest assessment of remaining lifespan so you are not guessing.
- Consider replacement if the unit is near or past its expected lifespan
- Factor in the cost of recurring service calls versus one full replacement
- Ask for a written inspection report before making a final decision
- Time major layout changes to coincide with equipment replacement when possible
Selecting Qualified Professionals for the Project
A layout overhaul touching plumbing, gas lines, and electrical connections is not a place to cut corners on expertise. Look for licensed water heater installers who are familiar with local code requirements for clearance, venting, and drainage, since an improperly installed unit can create both safety risks and inspection failures. Ask for references and confirm they carry proper insurance before work begins.
It also helps to choose a water heater repairman offering a complete water heater replacement service, meaning they handle removal of the old unit, disposal, and installation of the new one along with any layout adjustments in a single coordinated visit. This reduces the number of contractors you need to schedule and keeps the project moving on a predictable timeline.
- Verify licensing and insurance before signing any contract
- Ask how many similar layout changes the company has completed
- Request a detailed written estimate covering labor, materials, and permits
- Confirm who handles code inspections and final sign-off
Rethinking your utility room around a new water heater is a chance to solve problems you have probably lived with for years, from tight clearances to inconvenient shutoffs. Take measurements, weigh your system options, and address ventilation and storage needs before any new unit goes in. Getting the layout right the first time means easier maintenance, safer operation, and far fewer surprises down the road.